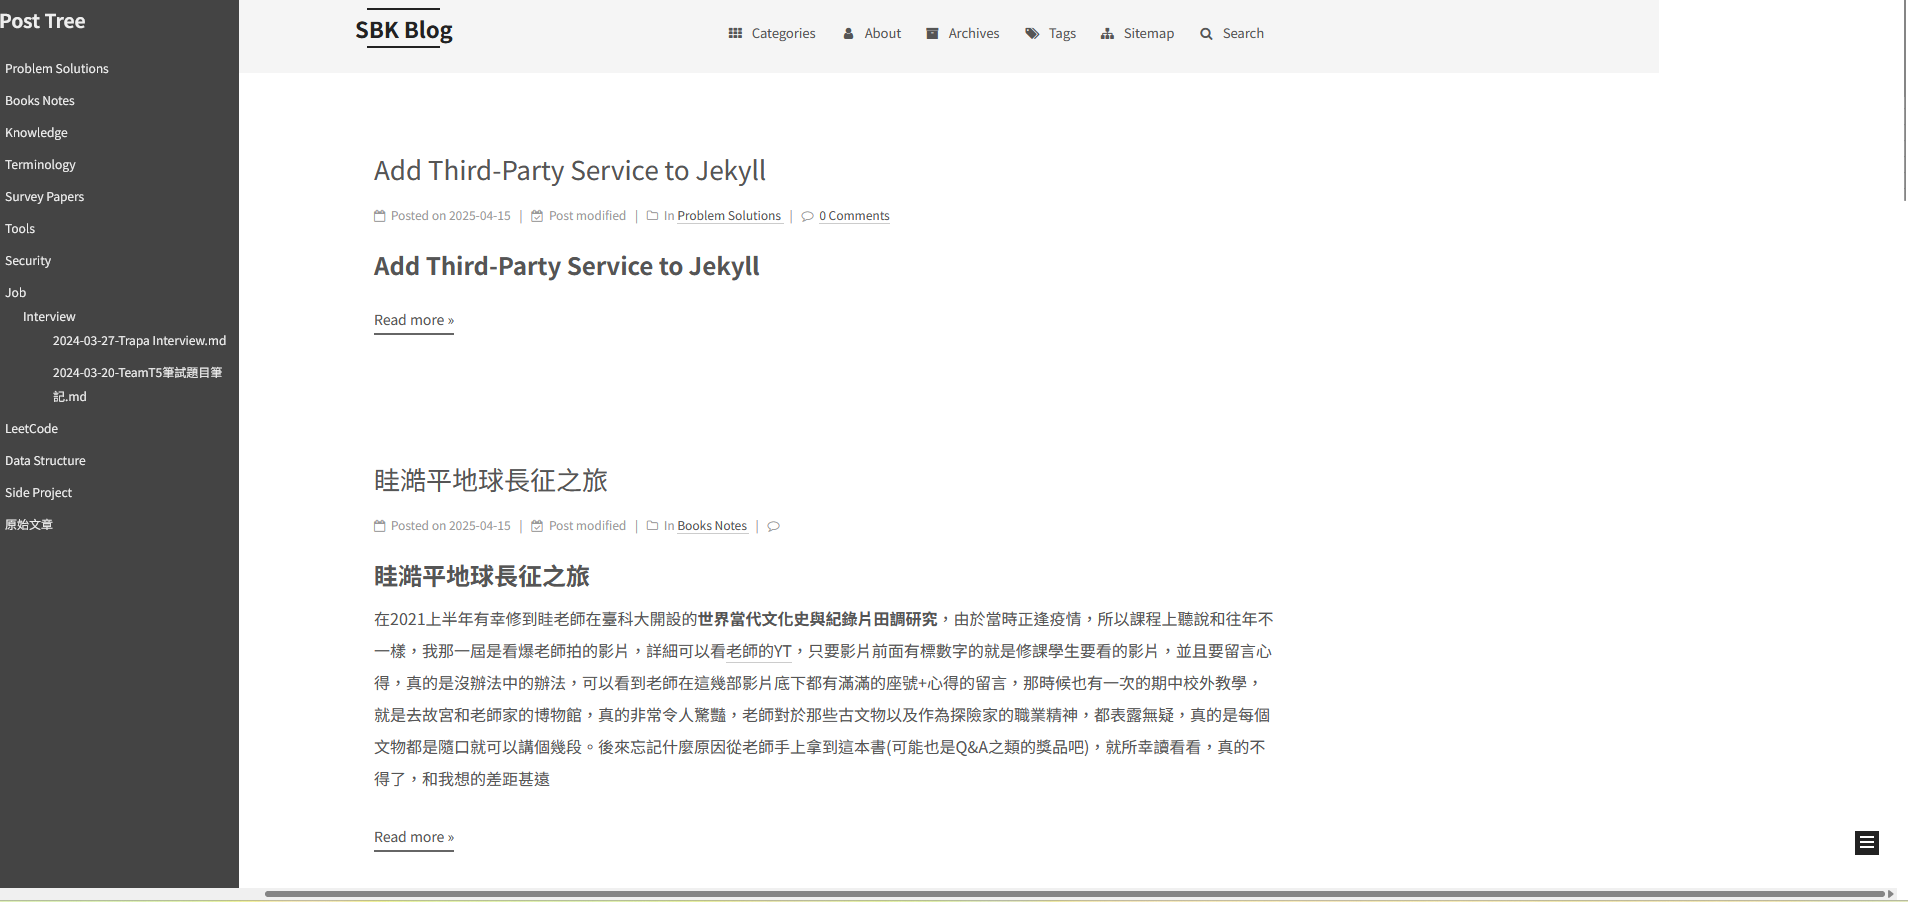
Add Custom Sidebar to Left Side
因為想要達到類似HackMD的書籤效果,就是在右邊可以有摺疊/展開的書籤,所以找了一個類似風格的Theme,並且寫一些Liquid Code盡量和他類似,這個語言有點麻煩
Prerequisite
如果可以盡量先熟悉Liquid語法: Tutorial
修改的文件
_includes/_layout.html
這個比較簡單理解,我預計是要寫一個html file,然後把他插在最外圍的頁面,而定義整個網站最外圍的就是_includes/_layout.html,我插在main tag中
_includes/_custom/sidebar-post.html
這個就比較複雜了,我的目標是可以parse三層的folder structure就好,所以當每一層中,每一個file/folder包含.md我就直接設定a tag和href,如果沒有代表是folder就繼續往下parse,需要特別注意的是,我在字串比對的時候需要先利用capture這個語法,意思是把leveln.name轉換成字串(意義不明的語法)
1 |
|
_sass/_custom/custom.scss
這是本來就存在的文件,只不過裡面是空的,就先拿來用,到這一步是相對花時間的,因為要慢慢在前端用DevTools查看比例,而且還要看不同裝置的layout有沒有跑掉
- 首先,我希望Post Tree這個sidebar可以一直存在於左側,所以和原本sidebar不同的是position和width
1
2
3
4
5
6
.custom-sidebar { position: fixed; ... width: 250px; ... }其他部分就和原本sidebar差不多
- 為了要有Indentation的layer效果,所以新增如下
1
2
3
4
5
6
7
8
9
10
// Indentation for tree level .custom-sidebar-menu > li { padding-left: 0.5em; } .custom-sidebar-menu li ul > li { padding-left: 1.5em; } .custom-sidebar-menu li ul li ul > li { padding-left: 2.5em; } - 特別針對sidebar顯示出來的title以及link做hover的效果以及定義顏色之類k2
1
2
3
4
5
6
7
8
9
10
11
12
13
14
.custom-sidebar-menu a { color: $gainsboro; text-decoration: none; } .custom-sidebar-menu a:hover { color: white; background-color: rgba(255, 255, 255, 0.1); } .custom-sidebar-menu a.active { font-weight: bold; color: white; } - 顯示分類的箭頭,點開detail標籤時,箭頭會右轉90度
1
2
3
4
5
6
7
8
9
10
11
12
13
14
15
16
17
18
19
20
// Custom sidebar styles details summary { cursor: pointer; list-style: none; position: relative; } details summary::before { content: '›'; position: absolute; right: 0.5rem; top: 2px; font-size: 1rem; transform-origin: center; transition: transform 0.2s ease; } details[open] summary::before { transform: rotate(90deg); } - 另外像是footer就需要特別注意,因為在
./_common/outline/outline.scss有特別定義footer的position以及width1
2
3
4
5
6
7.footer { position: absolute; left: 0; bottom: 0; width: 100%; min-height: $footer-height; }但是這會造成總畫面的寬度超過100%,這樣會變成底下一定會有一個scrollbar,並且右上角也有一些空白的缺口
 所以我直接設定.footer的width和position為relative和auto,並且為了不要讓視窗縮小的時候,sidebar擋住content,.main/.header/.footer我都設定margin-left為250px,這個數值和前面第一點是一樣的
1
2
3
4
5
6
7
8
9
10
11
12
13
14
15
16
17
18
19
20
21
22
23
24// Push main layout next to sidebar .footer { position: relative; width: auto; } .main, .header, .footer { margin-left: 250px; @include tablet() { margin-left: 0; } @include mobile() { margin-left: 0; } } .footer, .header { background: #FFF6E5; }